Extract Data
With this tool, you can select and download data for a specified area of interest. Layers that you select will be added to a ZIP, CSV, or KMZ file.
Layers to Extract
These are the layers in your table of contents from which you can extract features. Layers that are checked are extracted and included in the resulting ZIP or CSV file.
In order for a layer to appear in the list of layers to extract, you must either own the data or the owner of the data must enable exporting of the data. To enable data export on data you own:
- Open the item description of the data.
- Click the Settings tab.
- Scroll down to the Export Data section.
- Check Allow others to export to different formats. Click Save when finished.
If your analysis layer contains attachments, note that attachments will only be extracted if the output data format is a file geodatabase and the Clip features is unchecked.
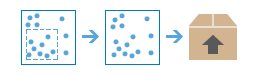
Study area
The area that defines which features will be included in the output ZIP or CSV file. You can choose from the following:
- The current visible extent of your map ( Same as Display).
- One of the layers in your table of contents.
- Draw an area to define the study area.
- Select features—Entire features that cross the boundary of the study area will be extracted.
- Clip features—Only those portions of features that are within the study area will be extracted.
Output data format
Format of the data that will be extracted. When exporting line or area features to CSV files, only non-spatial attributes are extracted. When exporting point features, both the spatial and non-spatial attributes are extracted.
Output file name
This is the name of the item that will be added to your My Content. The item name is based on the chosen Output data format. If the item already exists you will be asked to provide another name.
Using the Save result in drop-down box, you can specify the name of a folder in My Content where the result will be saved.