Create Drive-Time Areas
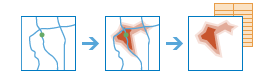
Create Drive-Time Areas creates areas that can be reached within a specified drive time, drive distance, walking distance, and so on. It measures out from one or many points (up to 1,000), along roads or walkways, to create a layer that can help you answer questions such as:
- Where can I go from here within a 30-minute drive?
- Where can I go from here within a 30-minute drive at 5:30 p.m. during rush hour?
- What is within a two-kilometer walk from my hotel?
- What areas of town can the fire department reach within five minutes?
- How would fire-response coverage improve by building a new fire station here?
- What market areas does my business cover?
You may be able to answer your questions solely through visualizing the output areas. Alternatively, you can perform further spatial analysis using the output areas. For instance, running Aggregate Points using drive-time areas with demographic data can help determine which potential store location would likely provide the best customer base for your type of business.
 | Tip: |
To create areas by measuring straight-line distance rather than by measuring along roads, use the Create Buffers tool instead. |
If Use current map extent is checked, only the features that are visible within the current map extent will be used to create drive-time- or drive-distance-based areas. If unchecked, all features in the input layer will be used, even if they are outside the current map extent.
Choose point layer to calculate drive-time areas around
The point features around which areas will be calculated. You can choose how areas are calculated based on travel mode (driving, trucking, or walking) and measure (time or distance).
In addition to choosing a layer from your map, you can select Choose Living Atlas Analysis Layer or Choose Analysis Layer found at the bottom of the drop-down list. This opens a gallery containing a collection of layers useful for many analyses.
The tool supports up to 1,000 features in the input layer.
Measure
Choose your travel mode (driving, trucking, or walking) and measure (time or distance). The available travel modes are determined by the administrator of your organization. After choosing your mode and measure, enter a duration or distance of up to 5 hours (300 minutes) or 300 miles (482.80 kilometers).
When you choose Driving time, you have options on how to measure the drive time.
-
Uncheck Use Traffic to create drive-time areas based on fixed speeds. This is the option to choose if you want a general drive-time area, not one that is calculated using changing traffic conditions for a specific departure time.
-
Check Use Traffic to create drive-time areas based on a given start time and changing traffic conditions. By also choosing the Live traffic option, the departure time from the input points is set to the current time, and current and predicted traffic speeds are referenced from sensors and feeds to create the drive-time areas. The predicted traffic speeds are calculated by referencing live traffic speeds, historical speeds, and current events such as weather. Traffic speeds are predicted 12 hours into the future, so you can move the slider to set the departure time ahead by up to 12 hours.
Use these live-traffic settings to find out what areas can be reached by departing now, departing in one hour from now, and so on.
-
By checking Use Traffic and choosing Traffic based on typical conditions for a day and time, the tool creates drive-time areas based on historical speed averages for every five-minute interval across a routine week. The results include traffic but remove the influence of current traffic conditions and events, which may vary significantly from the norm.
You can use these historical traffic settings to ask, for instance, "What areas can I generally reach when departing at 11:30 a.m. on a Wednesday?"
The time you set refers to the time zone in which your input points are located. So if you set the time to 8:00 a.m. and have two points, one in New York City and another in Los Angeles, the drive-time areas will be generated for 8:00 a.m. Eastern Time and 8:00 a.m. Pacific Time, respectively.
Note that as a vehicle drives outward from a point, time elapses and traffic conditions change. The Drive-Time Areas tool accounts for these variations when you choose Driving Time and check Use traffic; however, not all regions support traffic. Click the See availability link on the tool to find out whether it is offered in your study area.
Walking Time and Walking Distance use a fixed speed of 5 kilometers per hour (3.1 miles per hour) and follow pedestrian walkways as well as designated streets (while ignoring rules that affect automobiles, such as one-way streets).
Trucking Time and Trucking Distance use fixed speeds and follow rules that are applicable to heavy trucks.
Areas from different points
Choose how shared areas from different input points are handled when they reach one another. They can:
- Overlap—Areas from different input points may cover the same road. This is useful when you need to know all the input points that can reach a particular location within the given time or distance.
- Dissolve—All areas are merged into one, and no more than one area can cover a particular location. This is useful when all you need to know is that an area can be reached within a given time or distance, but you don't need to know which specific input points can reach the location.
- Split—The areas from different input locations that would overlap each other are split in the middle, so they abut one another instead. This is useful when you want to see which areas are within a given time or distance of the input points and, at the same time, determine which input point is closest to that area.
Result Layer Name
This is the name of the layer that will be created in My Content and added to the map. The default name is based on the tool name and the input layer name. If the layer already exists, you will be asked to provide another name.
Using the Save result in drop-down box, you can specify the name of a folder in My Content where the result will be saved.